One of the main reason for PHP’s popularity is that it plays well with a database system known as mysql. PHP and MYSQL underpin a huge portion of the web’s content and many systems, such as WordPress, draw upon both. During the WordPress lesson a while back you were creating and storing data in a mysql database that served as content for your webpages. In this lesson you are going to learn how to interact directly with databases without a go-between framework such as WordPress.
The first step is to create a database. You already created one in the WordPress lesson even if you did an automated installation. Now we are about to do so once again.
- Browse to YOUR subdomain and append cpanel to the url as in:
emuel.mynmi.net/cpanel
- Press return and click your way past any warnings that appear until you arrive at the cpanel login screen.
- Login with your new username and password.
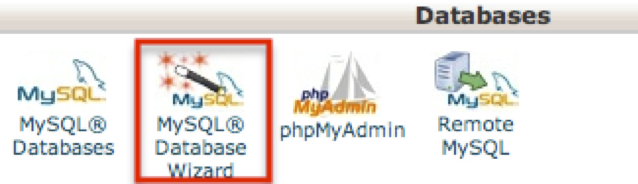
- Find your way to the Database portion of the cpanel and click on the MySQL Database Wizard.
 Create a new database based on your username (the name you login to cpanel with) and append _db2 to the name as in emuel_db2.
- Click the Next Step button and create a username. For simplicity, simply create a user with the same name as your database as in emuel_db2. Next create a password for the database. To protect your site from being hacked, I encourage you to create a STRONG password.
- Click Next Step, endow your new user with “all privileges”, and click Next Step again.

- You have created a new database and a new user, just like you did in the WordPress lesson but we have more work to do in the Cpanel, so click the home button to go there.
- Scroll back down to the Database portion of the cpanel and click the phpMyAdmin button. A new window should pop open which, on its left s
ide, lists your two databases, as shown to the right. Click on the _db2 database that you just created and look over to the right side of the page.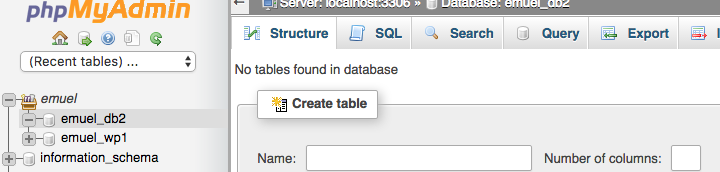
That’s where tables and data are displayed once you have some; which you don’t at this point. Just for fun click on the other database that you created for the WordPress lesson. It should have LOTS of tables and data. Explore at bit if you want to. If you look hard enough you can find pages, posts, urls, and just about anything else that you have done with your WordPress site.
- OK, back to _db2. We could create tables and type data into them but for this lesson we are going to import pre-existing data. Create a new tab with your browser, visit free.mynmi.net, download candidates.zip and unzip it. One of the files that appears should be named candidates.sql. This file contains your data.
- Return to phpMyAdmin, click the import tab

and then click choose file. Select
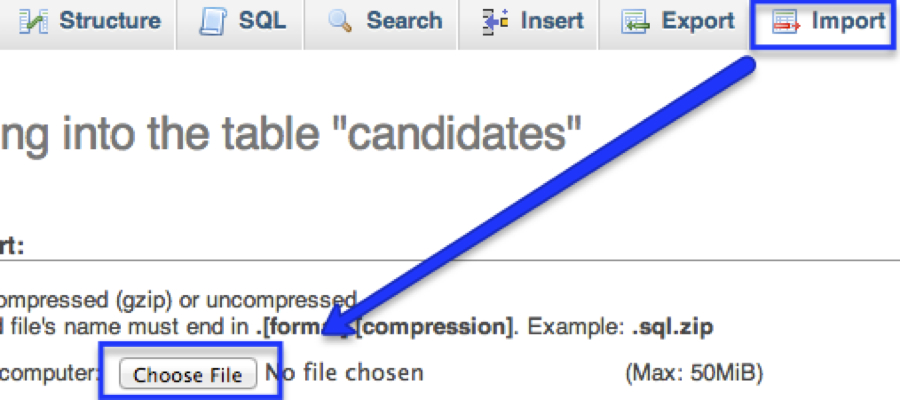 candidates.sql (probably in your downloads folder) and click the Go button. After the smoke clears you should have a new table in your db2 database called candidates which is chock full of information about the 2012 presidential candidates.
 - If the upload worked, skip to the next step. If, however, you clicked the go button and nothing happened you will need to take an alternate route in order to upload the data. You ONLY HAVE TO FOLLOW THESE STEPS IF THE PREVIOUS STEP FAILED.
- Return to free.mynmi.net and click on candidates.html. Select the first block of code under the heading Structure. This block begins with the words CREATE TABLE and ends with the word latin1.
- Return to phpmyadmin, make sure that db2 is still se
 lected and click on the SQL tab. Paste the data into the the big empty text box that appears below, and click go. Once you get the Success message, delete the code that you just pasted in.
 - Go back to candidates.html and select the final block of code that begins with INSERT INTO. Switch back to phpmyadmin, paste new block of code into the same big text box, and click go. Finally, your data should all be there!
- Click on candidates and then on the Browse tab. You should see lots of riveting information about people such as Newt Gingrich, Michelle Bachmann, and Herman Cain. Now lets learn how to get that information to a web page.
- The first step is to establish a successful connection to the database. Once connected, you can start pulling data. Open connection.php in the candidates folder that you just downloaded with Brackets.
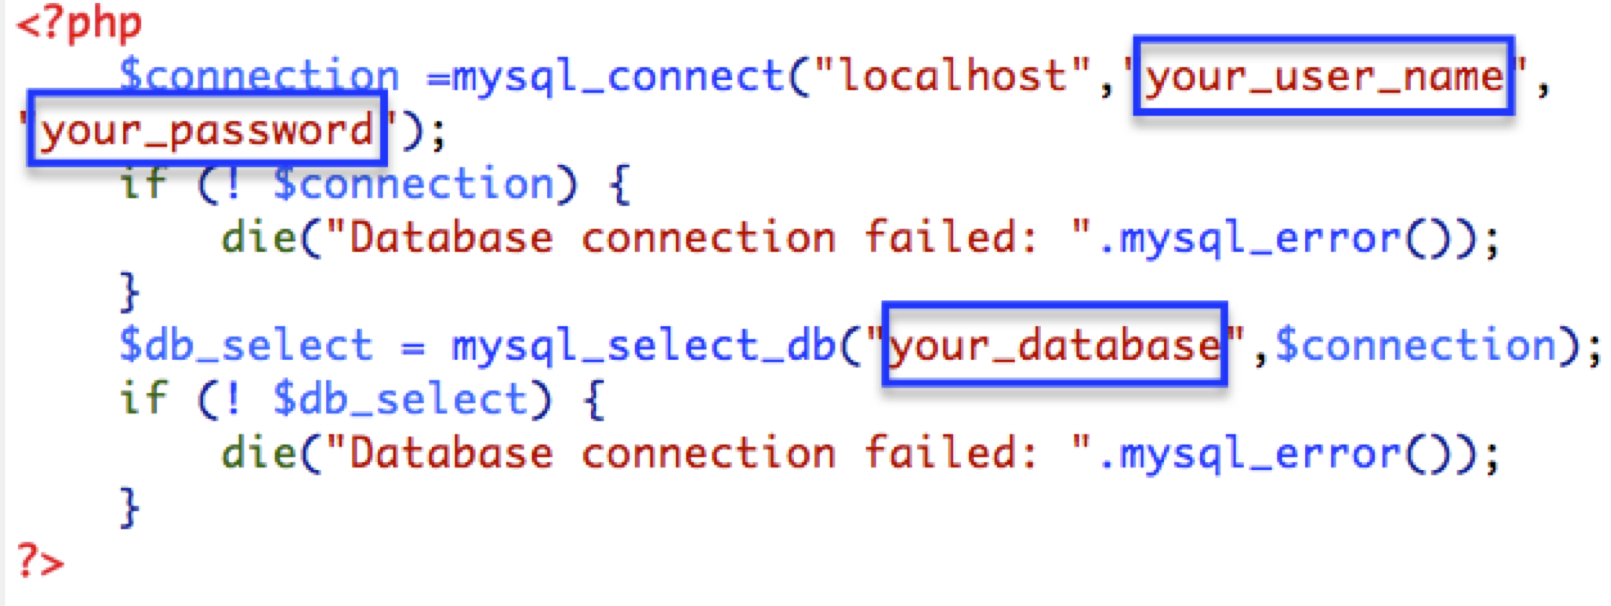 This file, shown at right, contains everything you need to connect. All you have to do is substitute the appropriate username, password, and database that you created earlier in the locations that are highlighted.In other words, if your username is john_db2, substitute john_db2 for “your_user_name”. If your database is also named john_db2, substitute john_db2 for “your_database” and, of course, enter the password that you created earlier in place of “your_password”. The only way to screw this up is to enter an incorrect value or to accidentally delete one of the quotation marks. So don’t.
 - Now take a look at the statements in this file. The first statement uses your username and password to establish a connection to the mysql server that holds your database(s) and ties the connection to a variable named, what else, $connection. The next statement that starts with if (! connection) checks to see if the connection was successful and alerts you if it was not successful. The next statement, starting with $db_select chooses a specific database. The if statement that follows (once again) reports a failure if there was one. You can think of those if statements as tattletales.
- Login to your site with cyberduck and create a new folder inside of public_html called db. Upload connection.php into the db folder and visit it with your browser to see if it works. For example, if your website url was lianneharris.com, you would browse to lianneharris/db/connection.php. If the page loads blank (aka zero content, aka white screen) and you don’t get an error message, it works! Congratulations, time to move to the next step. If you do have an error, double check your username, password, and table to make sure that everything is correct re-upload connection.php and test it again.
- Find candidates.php, upload it to the db folder and check it out in your browser. All of the candidates first and last names should appear. Now, open candidates.php and let’s take a look at how this minor miracle occurred.
- To begin with, look at line 2. [footnote]Which is actually the first line that actually does something.[/footnote] Line 2 has a require_once statement that loads connection.php, the file that you uploaded earlier. Without connection.php there is no (you guessed it) connection to the database. No connection no data. Line 3 “queries” the database, asks for everything in the candidates table (via the SELECT * command), and assigns that data to a variable named $get_data. $get_data, by the way is a totally arbitrary name. We could have named it $george, $gilbert, or $pinocchio and everything would work equally well.
 Line 4 checks to see if the query was successful and complains if it was not.
Lines 5-7 [footnote]I know, you’re getting weary but it’s about to get interesting :)[/footnote] are where the fun happens. The while statement creates a loop that doesn’t end until all of the data has been placed into an array named $rows. [footnote]Once again, the name $row has no special powers.[/footnote] The next two lines instruct the browser to display all of the data in the first_name and last_name columns. The <br/> tag creates a line break after each candidate’s first and last name appear. Note as well, the quotation marks (” “) at the end of line 6 that create space between the first and last names to prevent them from being stuck together. - This may feel like a lot to digest but at this point it’s quite easy to get the rest of the data and display it on a webpage. Let’s do it.
- From your ftp client (cyberduck perhaps?), click on candidates.php and open it with Brackets so that you can edit directly from the server.
- Remove .”<br/>” from the end of line 7. When you are finished the line should read like the following. Do NOT lose the semicolon!
-
echo $rows['last_name'];
- Add a new line (on line 8) that reads:
echo " was born in ".$rows[year_born]. "<br/>";
As you may surmise, this line should add a sentence that states, for example, Mitt Romney was born in 1947, for each candidate. Save, upload, and test candidates.php again.
- Once you persuade your browser to state the candidates’ age, it’s time to add some of the additional data to your page. Remove .”<br/>” from the end of line 8 and add a new line that says:
echo ", lives in ".$rows[state]. "<br/>";
- After you upload the file and browse it, the first line should read:
Mitt Romney was born in 1947, lives in Massachusetts
With similar lines for the rest of the candidates.
- Try this yourself. See if you can figure out how to add information about each candidate’s spouse so that each line reads something like:
Mitt Romney was born in 1947, lives in Massachusetts, and is married to Ann.
- Now figure out how to display the remainder of the data so that each line in the browser also says (for example) He or she is a Republican Mormon, He or she is a libertarian Baptist, etc.
- That was fun (I hope), but what if you wanted to display data for just one candidate. Let’s say that you are entranced by Newt Gingrich and want to know more about him, but only him. In that case you would use the SQL command WHERE to search for someone whose first name is Newt, last name is Gingrich, or both. Here’s how it works: simply add WHERE first_name=’Newt’ to the query statement (line 3). In other words, modify line 3 to read:
"SELECT * FROM candidates WHERE first_name='Newt'"
Save candidates.php and upload it again. This time the browser should display only Newt Gingrich’s information.
- The first step is to establish a successful connection to the database. Once connected, you can start pulling data. Open connection.php in the candidates folder that you just downloaded with Brackets.
Requesting Data with a Form
So far we have focused on calling data via “hard coding”; ie. the data calls are written into the webpage. This method is fine for some purposes but what if you had a lot of data that you wanted to offer users the opportunity to request small pieces of data from a large database; a phone directory for example? A common way to resolve this issue is to create a form that can be used to submit requests to the database. Time to learn how.
Suppose that we want to make it possible for visitors to our website to query information by submitting a candidates’s last name. Basically there are three steps:
- Create a form that submits a request to candidates.php.
- Insert a line of code that enables candidates.php to process the request and assign it to a variable.
- Change the SELECT WHERE statement in candidates.php so that it processes the value of the variable.
- Let’s begin with the form. Create a new html page, and name it pick_one.html.
- Build your form. The text box below has everything you need to get started. As you can see, your form must have an action and a method (post is the most common). Take note that there are two form tags. A starting tag that begins with <form action and an ending tag that reads </form> . Everything that you do from this point forward must take place between those two tags.
<form action="candidates.php" method="post"> </form>
- Begin by typing Last Name <input name=”lastname” type=”text”> between the form tags. Input name lastname is how the php document that receives the post will know how to identify the value. Text lets the form know that you want it to display a one line text box.
- Now add a submit button by entering <input type=”submit” name=”button” id=”button” value=”Submit”> When you are finished the complete form should look like this:
<form action="candidates.php" method="post"> Last Name <input name="lastname" type="text">
<input type="submit" name="button" id="button" value="Submit"></form>
- Save your document and return to candidates.php. Add this line of code to the TOP of your document, just below the <?php tag. It is important that this code go at the top of your document because it captures the posted value of lastname which it will use a bit farther down in the document to retrieve data for a specific candidate.
$lastname= $_POST["lastname"];
FYI: the second part of this line $_POST[“lastname, captures the lastname value from the form that you just created. $lastname is a brand new variable that provides a place to put the information from the form.
- Find the statement that begins with $get_data and change it to read:
$get_data = mysql_query("SELECT * FROM candidates WHERE last_name='$lastname'"Previously, we hard coded values so that WHERE last_name= ‘$lastname’ would have read something like WHERE last_name= ‘Obama’ which would call the data for a specific candidate. This time, we want more flexibility so we have assigned that value to a variable.
- That’s it. Save pick_one.html and upload it to the db folder. There is no need to upload candidates.php if you were editing it from the server. Browse to pick_one.html and pick a candidate by entering his or her name and clicking the submit button. Did it work? Great! Play a bit with the names of the various candidates.Just one more thing. Wouldn’t it be great if we could offer users a way to select candidates without having to know their names by giving them a list of names that they merely have to click? Of course it would! So let’s do it.
- Go back to pick_one.html, and replace Last Name <input name=”lastname” type=”text”> with the code in the box below to create a radio group of icons. Be sure not to delete the submit button code.
<label>
 <input type="radio" name="lastname" value="Obama" id="lastname_0">
 Obama</label>
 <br>
 <label>
 <input type="radio" name="lastname" value="Romney" id="lastname_1">
 Romney</label>
 <br>
 <label>
 <input type="radio" name="lastname" value="Santorum" id="lastname_2">
 Santorum</label>
Follow the example and enter ALL candidates (name=”lastname” value=” ” is the important part). Once you are done, you will have a series of radio buttons with each candidates name listed
beside it. Save pick_one.html and upload it again, unless you are editing directly from the server. If everything works properly you should be able to access the data for a given candidate simply by clicking their radio button and clicking submit.
Inserting Data from a Webpage
If you have ever registered for anything on the web, there is a high likelihood that you submitted data from a web-based form to a mysql database. The following exercise will show you how this is accomplished.
- The first step is to create a place to store the data. Return to your cpanel and login just as you did at the beginning of this php/mysql lesson, click on the phpmyadmin icon and then click on _db2 to bring up the same database that you have been working in.
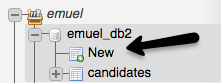 Click the New tab to create a new table. The table editor will appear with all kinds of confusing boxes and dropdown menus. As you can see there are lots of
options when you create a mysql table. For now, keep it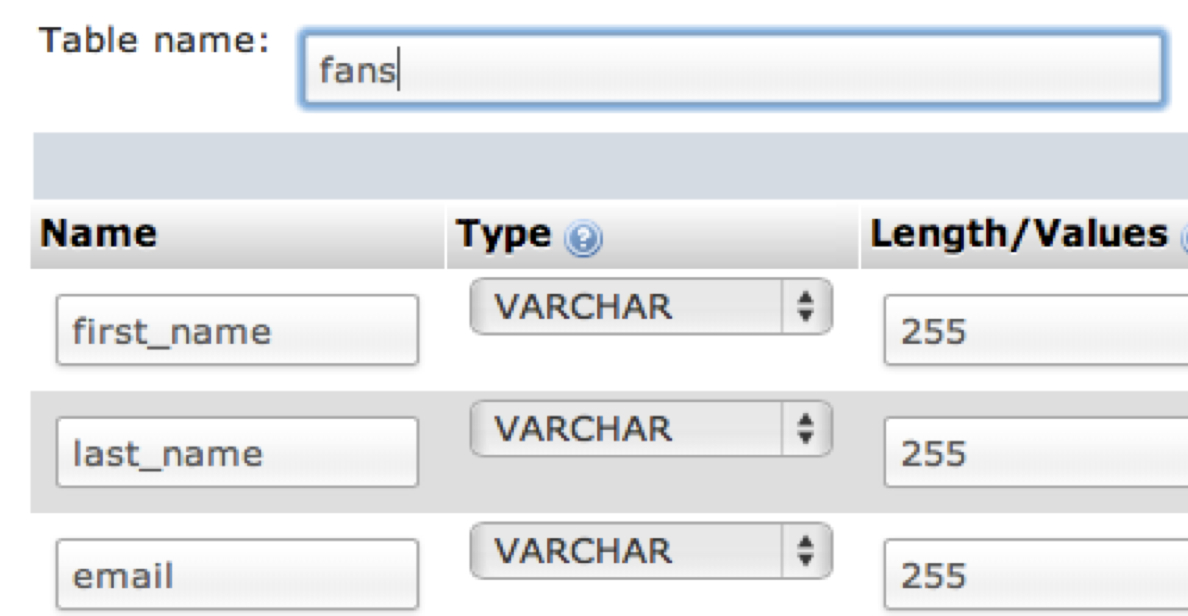 simple and create your table named fans just like the one in the screen capture at right.
After you are done, click Save. In case you are wondering, TYPE refers to the type of data that the field will be expected to store. In this case, we are storing mainly text data so we chose VARCHAR. You can also set the type to integer, date, text, and various other options. Length/Values refers to the character limit for a given row.- Time to get started. Candidates.php contains some of the information that we will need to connect to the database so duplicate it and save it as fans.php.
- Now we will modify it. From your ftp client, open fans.php with brackets.
- Start by getting rid of what you don’t need. Delete EVERYTHING after require_once(“connection.php”); [footnote]leave that[/footnote] all the way down the the ?>. When you are done your document should look like this:
<?php $lastname=$_POST["lastname"]; ?> <html> <body> <?php require_once("connection.php"; ?> </body> - Now let’s do some surgery on pick_one.html.
- Duplicate pick_one.html and save it as submit.php, change the form action to fans.php instead of candidates.php and add two additional text fields: firstname and email. When you are done, the source code of the form should like the screen capture below
 Make sure that each iteration of “name =” is the same in your document. Save submit.php.
 - Return to fans.php. The first step is to prepare this document to receive content from the form that you just created in submit.php. The good news is that you already have an example that you can expand on in line 2 where the statement $lastname= $_POST[“lastname”]; is already set up to receive surnames. Simply copy and paste this line twice. When you are your document should have 3 lines that look like the code below. Each of these lines assigns a variable of $lastname, $firstname, or $email to content that is posted to fans.php from submit.php.
$lastname= $_POST["lastname"];
$firstname= $_POST["firstname"];
$email= $_POST["email"];
- The next step is to set things up properly so that the submitted content will end up in the fans table of the _db2 database. Simply copy and paste the following two lines of code [footnote]available in copycode.html at free.mynmi.net[/footnote] immediately below the line that says:
require_once("connection.php");
$addfans="INSERT INTO fans (first_name, last_name, email)
VALUES   ('$firstname','$lastname','$email')";
Take a look at the code that you just pasted. The first line tells mysql to insert the values into the first_name, last_name and email columns that you created earlier. FYI: the $addfans variable is not strictly necessary but is quite useful because it creates a variable that can be tested to see if the insertion was successful. The second line, starting with VALUES tells mysql to insert the values for the three variables lastname, $firstname, and $email, that correspond to the data that was submitted. (whew) Did you get that?
- The final piece in this puzzle is to add feedback so that your users can tell whether or not they submitted successfully. To accomplish this step, insert the code in the box below, just below the line of code you just added in step 3.
if (!mysql_query($addfans,$connection)) //checks for failure) { echo "this didn't work <br/><br/>"; //if failure, "this didn't work" die('Error: ' . mysql_error()); } //gives information about the error else { echo "1 record added. It worked!";} //this one should be obvious :-) - Once you are done, your entire document should read like this:
<?php $lastname= $_POST["lastname"]; $firstname= $_POST["firstname"]; $email= $_POST["email"]; require_once("connection.php"); $addfans="INSERT INTO fans (first_name, last_name, email) VALUES ('$firstname','$lastname','$email')"; if (!mysql_query($addfans,$connection)) { echo "this didn't work <br/><br/>"; die('Error: ' . mysql_error()); } else { echo "1 record added";} ?> - Once both documents are ready, submit some data. Did it work? If so, submit at least five more times, using a different first name, last name, and email address each time.
- Feeling smart? Return to free.mynmi.net and download candidates.zip one more time. Unzip it, enter the folder that appears, and change the name of the newly downloaded candidates.php file to something like showfans.php. Next, edit showfans.php so that it SELECTs the fans table instead of the candidates table. showfans.php at this point is already set up to pull data from the first_name and last_name columns of your DB. All you have to do is get read of the line that asks for the year_born column (which doesn’t exist in the fans table) and replace it with a new line that pulls from the email column. EASY!
- Duplicate pick_one.html and save it as submit.php, change the form action to fans.php instead of candidates.php and add two additional text fields: firstname and email. When you are done, the source code of the form should like the screen capture below