Adobe Brackets is the free code editor that we suggest you use for this course. We are very impressed with Brackets and think that you will be too. To start this lesson, open Brackets.
Features
- Extensions! This is a wonderful feature of Brackets that keeps getting better. There is a very active community of open source contributors who constantly provide new extensions that increase Bracket’s
 range and efficiency. One of my favorites is html skeleton, which generates all of the basic elements of a webpage whenever you click it’s button. In other words, it saves you a LOT of typing! To enable html skeleton:
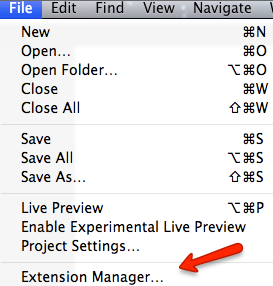
- Click File and select Extension Manager and then click the available tab as shown below. Search for html skeleton and install it.
- While you are in extension, explore additional extensions. You may find something you like.

- Now that you have enabled the Skeleton extension let’s put it to work.
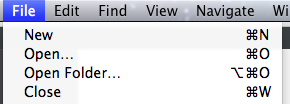
- Create a new file (Command N or File New).
- Click the Skeleton Icon
 on the right side of the Brackets window. A new window will pop up. Under elements, check the box for Full HTML Skeleton and click Done. At this point, pretty much everything you need for starting an HTML file should be inside of your new file.
 - Type “Hello World” between the <body> and </body> tags and save the file as hello.html inside of the mysite folder that you created in the previous lesson (unless you’re just looking at this lesson as a refresher).
- Okay, one more extension!
- Again, click File > Extension Manager. Then, search for Beautify (not beautify.io), and then click Install.
- Next, open any of your html documents (if you have any). Right click anywhere on the document that’s not over text, and select Beautify from the popup menu.
- Tah dah! Basically, the plugin organizes all of your messy code into a clean, easy-to-read layout. Handy!
- File location and integration. Web page production requires you to add links to lots of separate files; image files, css files, javascript files, etc. Brackets can help you to find those files. To enable this feature you must
- Open the mysite folder from the File menu by selecting File and then Open Folder.
- At this point Brackets should show you all of the files and folders that are inside of the mysite folder. In particular you should see hello.html and index.html.
- Open the index.html file Start entering a link (just after the <body> tag) as in
<a href=” and connect to hello.html.
. All you have to do is browse to the hello.html, select it and then finish off the rest of the link Check out this dramatic! ten second video to see the process in action.
- Use a similar process for integrating images into your webpage. For example, as soon as you enter <img src=” Brackets will, once again, display a list of files and folders. To select a file, simply click on it’s name. At this point, you probably don’t have any images to insert, so just remember how for now. Also, to select a folder that is outside of the folder you are working in, enter ../ (that’s right, dot dot forward slash).
- Live Preview.
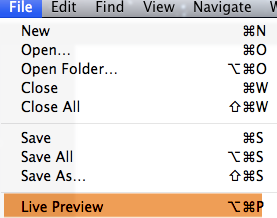 Whenever you want to see what a webpage REALLY looks like, select Live Preview from the File menu. Even better, if you exercised the ‘open folder’ option that was mentioned earlier, the live preview will automatically update as you make changes to the document in Brackets. For example, if you change a font size, background color, add additional text, etc. to a document with Brackets, the live preview version in the browser should demo those changes as you make them. BTW, live preview only works with Google Chrome.
 - Color Picker. Yes, Brackets has a built in color picker that allows you to easily set or change a font or background color. To activate the color picker:
- Open style.css (from the previous lesson), and find the background-color rule that you created for the body class( background-color: #F00 or something of the sort).
- Right-click on the color and sele
 ct “Quick Edit” to activate the color picker. Pick your color and close the picker.
 - BTW, as you begin to enter a color for a new rule another, lesser, color picker may appear that prompts you to select a ‘named’ color such as aliceblue or aqua. I would advise that you ignore this option and simply type any hex color beginning with the # sign, and then ‘quick edit’ it. You will have many more color options with this procedure. I usually opt for #000 (three is actually enough to kick things off) because it is easy to remember.