Access Jquery
The first step in using jquery is to hook your webpage up the the jquery library by either downloading and linking to a jquery file that you own and control, or by linking to someone else’s jquery file that is already online. For these exercises you will download files that are linked directly to the latest version of jquery directly from the jquery website, with this line of code:
<script src="http://code.jquery.com/jquery-latest.js"></script>
Download Exercise Files
1. Visit free.mynmi.net, download the file named jq1.zip and unzip it.
2. Drag the jq1 folder into your mysite folder.
SlideToggle
We will start our exploration of jquery with a tool called SlideToggle that employs a built in animation to hide and reveal content.
1. Open the file named slideToggle.html with your text editor (most likely Brackets).
2. Inside of the head tag you should see the code below. The first two lines describe a CSS style named #content that defines a div tag. The third line links to the jquery library (jquery-latest.js) that we need to perform all of the upcoming magic.
<style>    #content { width:600px;
<!--display: none;-->  }  </style>
<script src="http://code.jquery.com/jquery-latest.js"></script>
Take note as well that the second line display: none, which would make the div tag invisible, has been commented out. Later on we will remove that comment.
3. Now look directly below the <body> tag at the line of code that says: <button>Reveal (or hide) the Monkey</button> Click Live View to see what that button looks like in the wysiwyg view.
4. Look at the next line of code that creates a div tag and places a rhesus monkey inside:
<div id=”content”><img src=”monkee4.jpg” width=”579″ height=”368″ alt=”monkee”></div>
5. The next four lines, shown below contain the jquery commands that control the #content div tag. Let’s dissect them.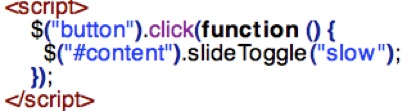
a) Take note of the <script> and </script> tags that bracket the javascript statement. The purpose of the first tag is to inform the browser that there is javascript ahead; the </script> tells the browser that the javascript has just ended.
b) The second line, the one that starts with $(“button”).click instructs the browser to instigate a function whenever someone clicks the “Reveal (or hide) The Monkey” button
c) The next line defines the function. It instructs the browser to apply slideToggle to the #content div tag and to do it slow.
d) By the way, this particular function is what is known as an “anonymous function”. Anonymous functions have no name because they are designed to automatically operate on a designated element in a webpage. This particular function operates whenever you click on ANY button in the webpage.
6. Time to play a bit. Preview the file in your browser and click the “Reveal (or hide) The Monkey” to see what happens. The monkey should slowly disappear. Click again; the monkey should reappear.
7. Change the speed from “slow” to “fast” and click the button a few more times. Did the monkey speed up? As it turns out, the “slow” setting is set to 600 milliseconds while “fast” is set to 200 milliseconds.
8. Now that you know about milliseconds you can fine tune the speed of the animation. Change the speed to 5000 as in slideToggle(5000); and click the button again. The monkey should slow down dramatically and take 5 seconds to appear or reappear. Now change the number to 100. The animation should now be really fast.
9. Reset the animation speed to “slow”, take a look at the CSS that defines the #content div tag and remove the comment from <!–display: none;–> so that it reads display: none;
10. Now the monkey should disappear by default but reappear once you click the button. Ie. it toggles.
11. So far we have been revealing and hiding a monkey picture but be aware that the slideToggle effect applies to whatever is inside the div tag. Delete the monkey and type a bunch of text inside of the div tag. Now click the button. The text should be have just like the monkey.
12. SlideToggle can also be used with other html and CSS elements such as <p> (paragraph) tags or CSS class tags.
(a) To demonstrate, delete the code that defines the div tag ( <div id=”content”>) and replace it with <p> . Next, delete </div> and replace it with </p>.
(b) Now target the <p> tag by changing $(“#content”).slideToggle(“slow”); to $(“p”).slideToggle(“slow”);
(c) Click the button and everything should work as before. By the way, if you add additional <p> tags, all will disappear and reappear simultaneously, which should indicate that id tags offer a lot more flexibility!
SlideToggle is just one of many methods for revealing and hiding content that jquery offers. Others (all of which do more or less what their names indicate) include slideUp, slideDown, fadeIn, fadeOut. Examples of all of these methods and more are available at http://api.jquery.com.