The exercises in this section either do not fit into the main three main sections, Html/css, WordPress, and Introductory Coding, or have been extracted from the Html/Css section in order to make more time in the semester for new material. The Audio Effects lesson, in particular, is one of my favorites because students enjoy it a lot and it and because it offers a fundamental lesson in sound editing.
Audio Effects. Dedicated to Kelly Tribble
Sometimes you get lucky and have the opportunity to collaborate with someone who is a real pleasure to work with. Such was my working relationship with Kelly Tribble. In addition to being a hardworking, talented guy, Kelly was a human multimedia machine who could generate a seemingly limitless variety of sounds for the projects that we worked on together. By smacking his lips, clicking his tongue, thumping his cheek, etc. Kelly could convincingly mimic the sound of a soccer ball being kicked, a fish splashing in water, or seemingly anything he wanted to imitate. I could never hope to match Kelly’s talents as a producer of sounds but I did pick up on one of his tricks: amplification. A seemingly soft sound can become something very different when it is magnified.
Sound Exercise 1
1. To explore the “Kelly Effect”, find and open a program called Audacity.
2. Click the record button, position your mouth approximately 8 inches away from the isight on top of your computer and embarrass yourself by making a puffing sound, clicking your tongue and anything else that occurs to you. When finished, stop the recording.
3. Play the recording and watch the graphic sound display as you listen to your recording.
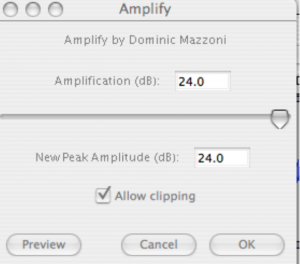
4. Select a portion of one of your sounds (one thump for example) and amplify it (Effect-amplify)
5. Listen to the sound. Loud enough? If not, Effect- Repeat Amplify – until you are satisfied.
Still not satisfied? Try some of the other effects such as speed and pitch (you too can sound like a chipmunk) or even phaser.
6. Once you have a sound that you like, you can easily export it for use in flash or some other application. With the sound selected, File – Export as Wav.
7. Now try File – Export as MP3. Can’t do it? Blame the lawyers because a lot of organizations claim ownership of the mp3 format and the Audacity developers don’t want to be sued. Their way around this issue is to require a download of the lame library (lame.lib). If you are a Georgia Journalism Academy student, you will find lame.lib on your desktop. Otherwise, follow Audacity’s cues to find or download LameLib. (or try going to http://spaghetticode.org/lame/ and download LameLib-Carbon.sit . Once the file is uncompressed, drag the result (named LameLib) into the applications folder)
8. Export as MP3 again and this time Play around with some of the other “kellysounds” and re-record if you like.
9. Find the sound that you like the best, select, copy, and paste it somewhere further down the Audacity timeline. This is how sounds are pieced together.
